Guide to Adding a Bulb in The TUO Life App
Step-by-Step Guide for both Android and iOS
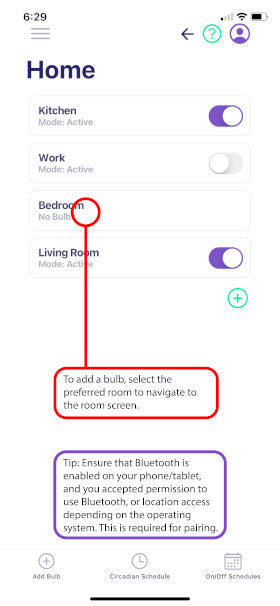
This guide assumes that you have created a room. For help in creating a room, see the add room guide. You can also click 'Add Bulb' in the bottom left-hand corner of The TUO Life App's home screen to add a bulb and create your first room. Just follow the steps as they display in the app.
Step 1
If this is your first time adding a bulb, you'll be prompted to accept permissions.
Step 2

If you have bulbs already, just tap the '+' symbol to add another bulb.
Step 3
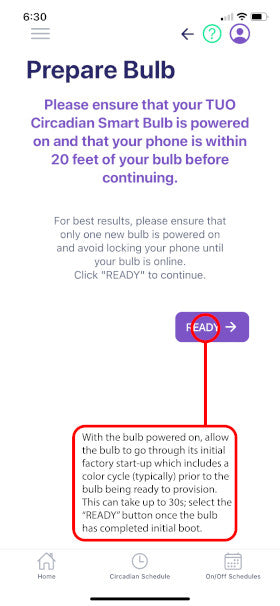
Your iOS or Android device communicates directly with your bulb for setup. Be sure to keep your device close to your phone.
Step 4

On Android, you may see a notice asking you to select the device and approve connection. Click yes when prompted.
Step 5

Hang tight, you'll see the next screen when your device connects to your bulb.
Step 6

Use a name that's unique to this bulb. The name is the only way you'll be able to differentiate bulbs.
Step 7

Select '+ New Room' from the dropdown to create a new room for this bulb.
Step 8

If you don't see your network, make sure it's up and running, and then click the refresh symbol to reload available networks.
Step 9

Only supported networks will show in this list so feel free to select the one you want.
Step 10

Make sure your password is correct. Passwords are case and space sensitive.
Step 11

You'll see a series of processing messages as your bulb is provisioned, stay tuned.
Step 12

If your bulb turns red, wait until it flashes back white again and then follow the instructions in the app to try again.